How to Frost Cupcakes Using Three Colors of Frosting and One Piping Bag
Alec just love working in the kitchen and learning new skills. Lately his focus has turned from trying out cake and frosting recipes to actually decorating the cakes and cupcakes.
I offered to teach him how to frost a cupcake using multiple colors of frosting wile only using one piping bag.
We do have a coupler for our frosting tips but I actually find it easier to not use it!
After whipping up his favorite vanilla cupcakes and frosting, we set about dividing our frosting into three bowls.

Linking Up With:
I offered to teach him how to frost a cupcake using multiple colors of frosting wile only using one piping bag.
We do have a coupler for our frosting tips but I actually find it easier to not use it!
After whipping up his favorite vanilla cupcakes and frosting, we set about dividing our frosting into three bowls.
We dyed one bowl of frosting red, another blue, and left the last bowl white. However, this technique works well with any three colors of frosting!
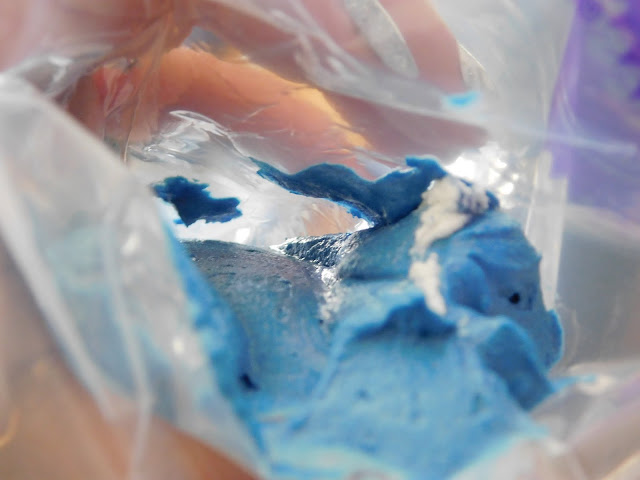
We took our piping bag with our large start tip already affixed to the end and began adding in our frosting. You want to make sure to add one color to the bag at a time, making sure to keep that one color as close to one side of the bag as you can.
I then use a knife to add the second color to the side of the piping bag opposite of my first color.
Using a spoon I filled up the middle of the piping bag with the white frosting.
We used a paper plate to practice on and to squeeze some of the frosting out until we had the swirled look we were going for and then he set to work frosting the cakes. Each cupcake comes out just a bit differently depending on what color is squeezing out of the tip at a time.
We did have to re-fill the bag at least once and made sure to match up the blue frosting with the blue side of the bag, the red on the red side and the white in the middle. We also squeezed it out onto a plate until we had our desired look.
Here is another example of the swirled frosting using brown, orange and yellow. This is an adorable lion cake I made for my sister's baby shower a few years ago. I had put brown and orange down the two sides of the piping bag and filled in with the yellow color.
 |
| I know it looks like I have white mixed in with the blue in this bag but that is just the light; this is just the blue frosting spread onto one side of the piping bag all the way to the tip. |
I then use a knife to add the second color to the side of the piping bag opposite of my first color.
Using a spoon I filled up the middle of the piping bag with the white frosting.
We used a paper plate to practice on and to squeeze some of the frosting out until we had the swirled look we were going for and then he set to work frosting the cakes. Each cupcake comes out just a bit differently depending on what color is squeezing out of the tip at a time.
We did have to re-fill the bag at least once and made sure to match up the blue frosting with the blue side of the bag, the red on the red side and the white in the middle. We also squeezed it out onto a plate until we had our desired look.
Here is another example of the swirled frosting using brown, orange and yellow. This is an adorable lion cake I made for my sister's baby shower a few years ago. I had put brown and orange down the two sides of the piping bag and filled in with the yellow color.

Linking Up With:


Love the lion -the colors are perfect!
ReplyDeleteThank you! It sure was a hit at her Lion King shower.
DeleteThose cupcakes look great! Cute lion cake!
ReplyDeleteThank you!
DeleteWow, that looks cool! Love the lion!
ReplyDeleteThank you!
DeleteThanks for joining the first ever Reader Tip Tuesday! I hope you join us at this week's party: http://www.jodiefitz.com/2017/08/08/reader-tip-tuesday-food-craft-party/
ReplyDeleteHave a GREAT day...
Thanks for the reminder; I meant to add this link up to my list of linky parties and I had forgotten! It's on there now so I'll definitely remember for next week.
DeleteCool idea!! Thanks so much for linking up with me at #AThemedLinkup 20 for All Things American (red, white, and blue), open June 27 to July 25. All party entries shared if social media buttons installed.
ReplyDeleteThanks!
DeleteThanks for the tutorial! I need to try this!
ReplyDeleteYou're welcome! It looked so intimidating to me but once we gave it a shot it was really rather easy to do!
DeleteHey, I'm 7 years late to the party, but this information is wonderful! Thanks. :)
ReplyDeleteYou're welcome!!
Delete